The following series of posts will document my journey to full Home Automation using the MQTT protocol, all custom hardware (Arduino and ESP8266 based), and all tied together using OpenHAB
- Part 1: Setting up the server / environment
- Part 2: Publish, Subscribe, Command, State, and WTFs
- Part 3: Hardware: Arduino with Ethernet Shield
- Part 4: Hardware: ESP8266 with NodeMCU firmware
- Part 5: Hardware: Sensors
- Part 5.1: Graphing Sensor Data
- Part 6: OpenHAB Automation Rules
This article assumes the reader is familiar with WHAT the various components mentioned above is. You won’t need an in depth understanding – I will try and explain, but as long as you understand what each of the following is you should be able to follow along:
- MQTT: Message Queue Telemetry Transport) is a publish-subscribe based “light weight” messaging protocol for use on top of the TCP/IP protocol. It is designed for connections with remote locations where a “small code footprint” is required and/or network bandwidth is limited. The Publish-Subscribe messaging pattern requires a message broker. The broker is responsible for distributing messages to interested clients based on the topic of a message. Andy Stanford-Clark and Arlen Nipper of Cirrus Link Solutions authored the first version of the protocol in 1999. See http://mqtt.org/
- Mosquitto: A MQTT Broker. A broker is a service running between the publisher and the subscriber – provides message exchange, QoS, etc. This is the most important core for OpenHAB to be able to interact with Hardware in this configuration See http://mosquitto.org/
- NodeMCU: An alternative firmware for ESP8266 Wifi Modules. Using LUA as a language – very easy to program, comes with good MQTT Support. See http://nodemcu.com/index_en.html
- OpenHAB – Open Source Home Automation platform – ties all the various bits of (vendor agnostic) hardware together into a harmonious control system. See http://www.openhab.org/
The very first thing you would need to do before you can begin, is to install the following software. In my case I am doing all my configuration a Ubuntu 14.04 server. I did try a Raspberry Pi V1 but it was just too slow.
Add the OpenHAB repository:
1. Add the OpenHab Repository
sudo nano /etc/apt/sources.list.d/openhab.list
2. Insert
deb http://repository-openhab.forge.cloudbees.com/release/1.6.2/apt-repo/ /
and save the file
3. Install Java
echo "deb http://ppa.launchpad.net/webupd8team/java/ubuntu trusty main" | tee /etc/apt/sources.list.d/webupd8team-java.list
echo "deb-src http://ppa.launchpad.net/webupd8team/java/ubuntu trusty main" | tee -a /etc/apt/sources.list.d/webupd8team-java.list
apt-get install oracle-java8-installer
4. Install OpenHAB
sudo apt-get install openhab-runtime openhab-addon-binding-mqtt openhab-addon-action-mail openhab-addon-binding-bluetooth openhab-addon-binding-serial openhab-addon-binding-weather openhab-addon-persistence-rrd4j
Note there are a LOT more add-ons, bindings, etc: Have a look at which others may interest you:
sudo apt-cache search openhab
5. Install Mosquitto
sudo apt-add-repository ppa:mosquitto-dev/mosquitto-ppa
sudo apt-get install mosquitto mosquitto-clients
6. Start and Test Mosquitto
sudo /etc/init.d/mosquitto start
On one terminal: Start a Subscription client to test with:
mosquitto_sub -d -t hello/world
On a seperate terminal: Push a publication to the hello/world topic:
mosquitto_pub -d -t hello/world -m "Hello from MQTT"
7. Demo OpenHAB Configuration
You can download a OpenHAB demo configuration from https://github.com/openhab/openhab/releases/download/v1.6.2/distribution-1.6.2-demo-configuration.zip
For me this helped quite a bit – since seeing how things get done, often helps getting it done
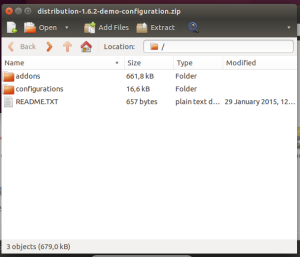
Open the ZIP:
Extract “addons” to /usr/share/openhab (overwrite existing folder)
Extract “configurations” to /etc/openhab/ (overwrite existing folder)
Proceed to start OpenHAB
sudo /etc/init.d/openhab start
8. Log into your demo sitemap:
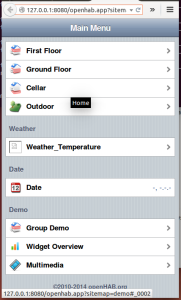
http://127.0.0.1:8080/openhab.app?sitemap=demo
This will allow you to explore the basic UI. Yes I agree it looks like an old version of iOS – blegh – but OpenHAB2 is currently in development and besides OpenHAB1 can be controlled through the much more awesome Android/iOS apps, as well as the fact that once properly configured you shouldn’t have to log into the web interface ever since your smart wall panels, presence detection, automation rules etc is suppose to control your habitat based on Events not clicks (:
9. Configure OpenHAB to use a MQTT Binding
sudo vi /etc/openhab/configurations/openhab.cfg
At the very bottom, define a MQTT Broker:
mqtt:broker.url=tcp://192.168.0.100:1883
mqtt:broker.clientId=openhab
Exit, Save, and restart OpenHAB
sudo /etc/init.d/openhab restart


