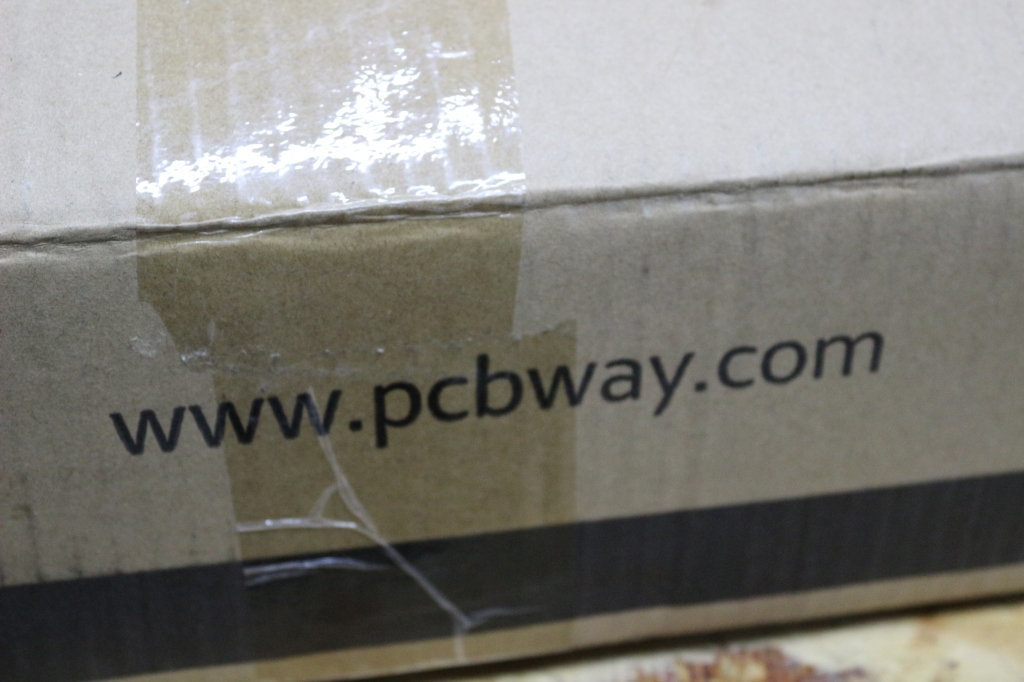
Happy Friday, guess what showed up at my door at last (: New circuit boards! This time, I ordered some boards (all of the boards shown here were $0.50 each!) from PCBWay in China
They arrived in a sturdy cardboard box, with a generous amount of Bubblewrap around it – compared to some of the other chinese PCB houses that ship boards directly in a DHL/Fedex bag, this is a nice upgrade Speaking of shipping, I paid for Fedex Express (cheaper option) but as Fedex suspended the cheaper options due to the ongoing Coronavirus Pandemic, PCBWay bumped up the shipping to Fedex Priority! And they did that, out of there pockets! You don’t see that happening a lot! I am impressed!
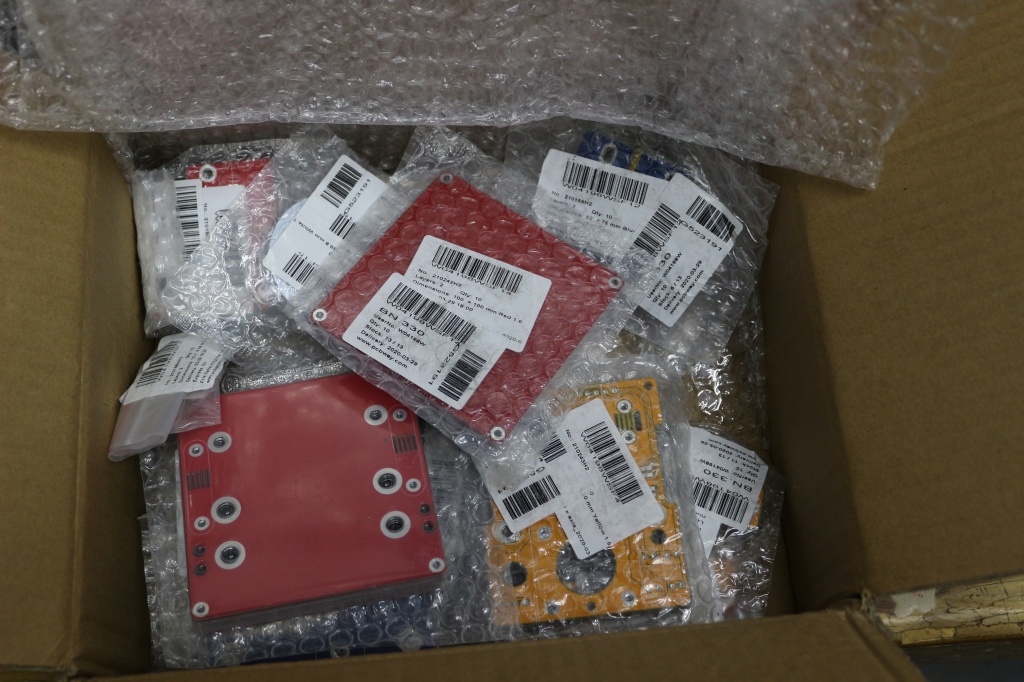
Each of the set of boards came nicely shrink wrapped with more bubble wrap, no damage to any of the boards in shipping. I did order a couple really tiny PCBs (8x16mm) that of course couldn’t be shrunkwrapped, but they were still nicely packed in ziplock baggies.
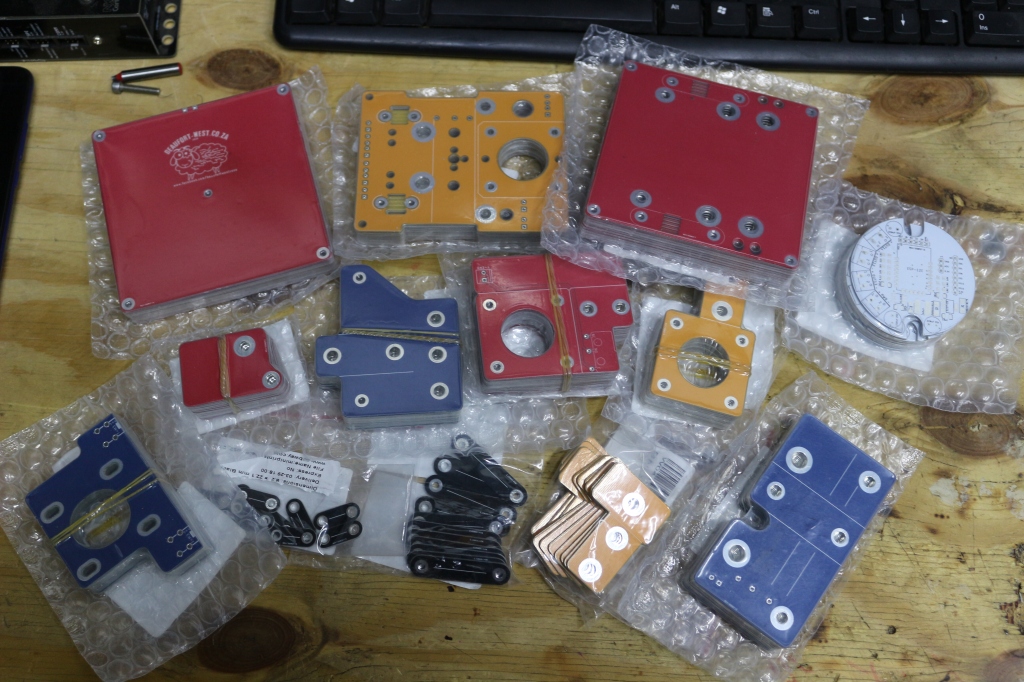
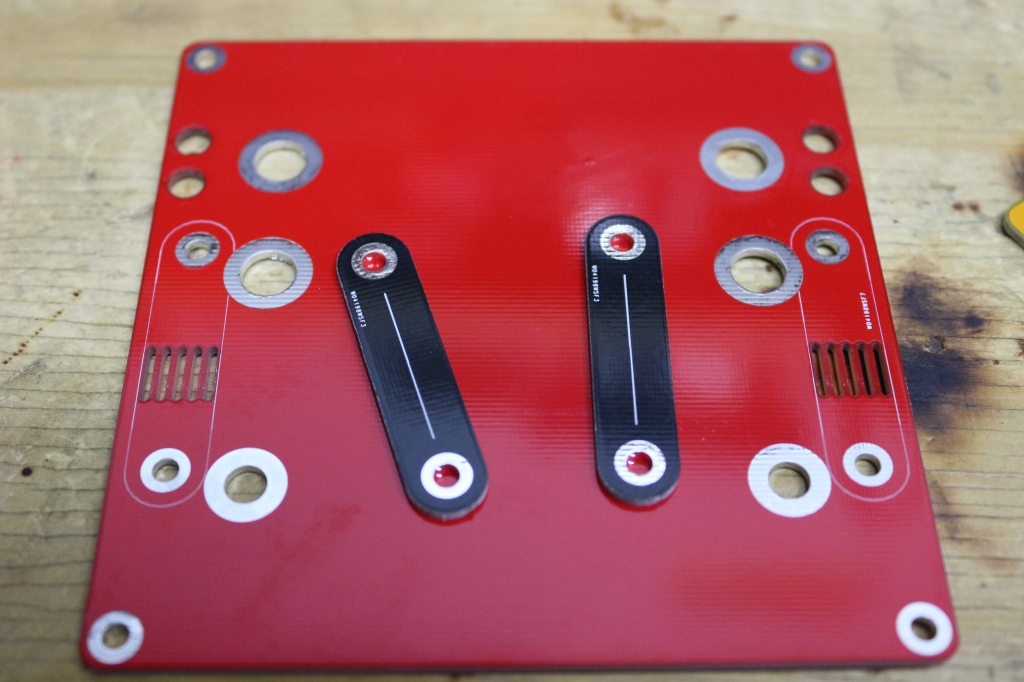
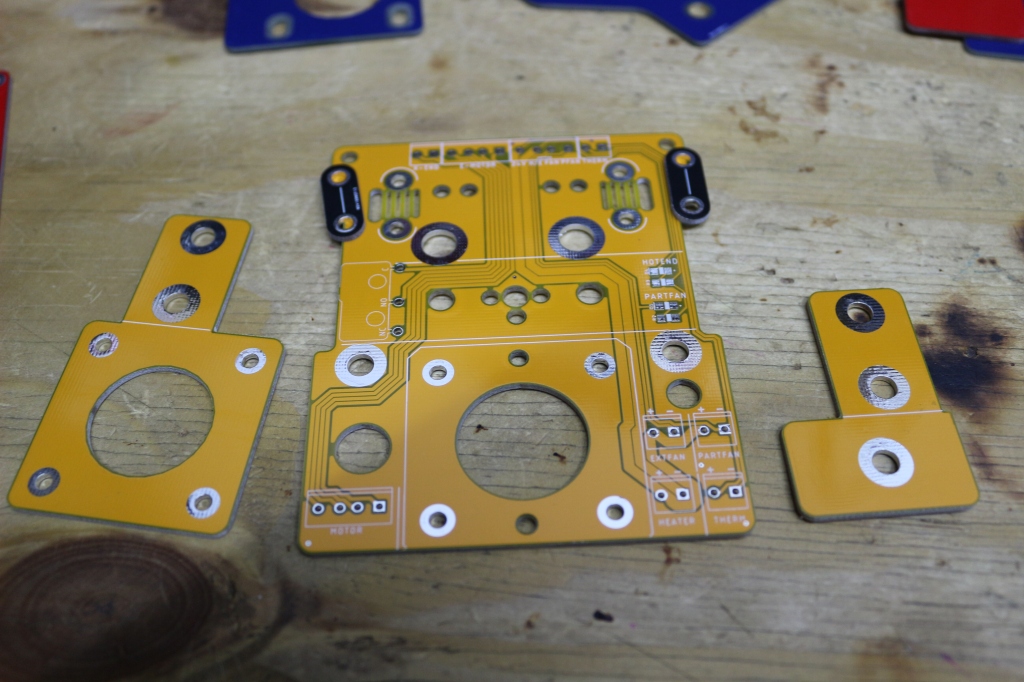
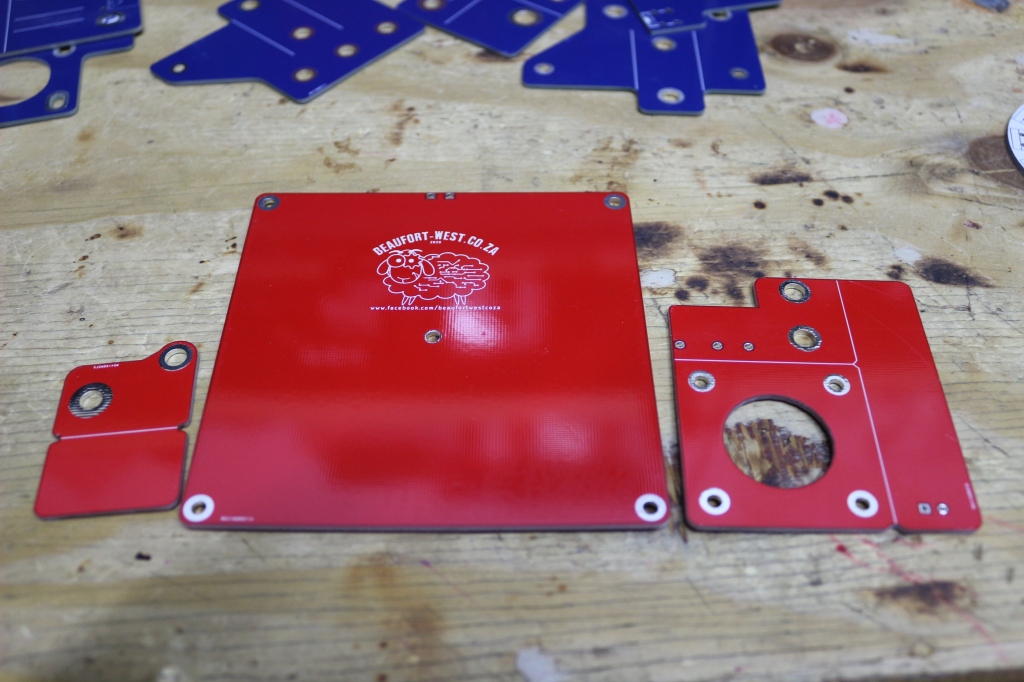
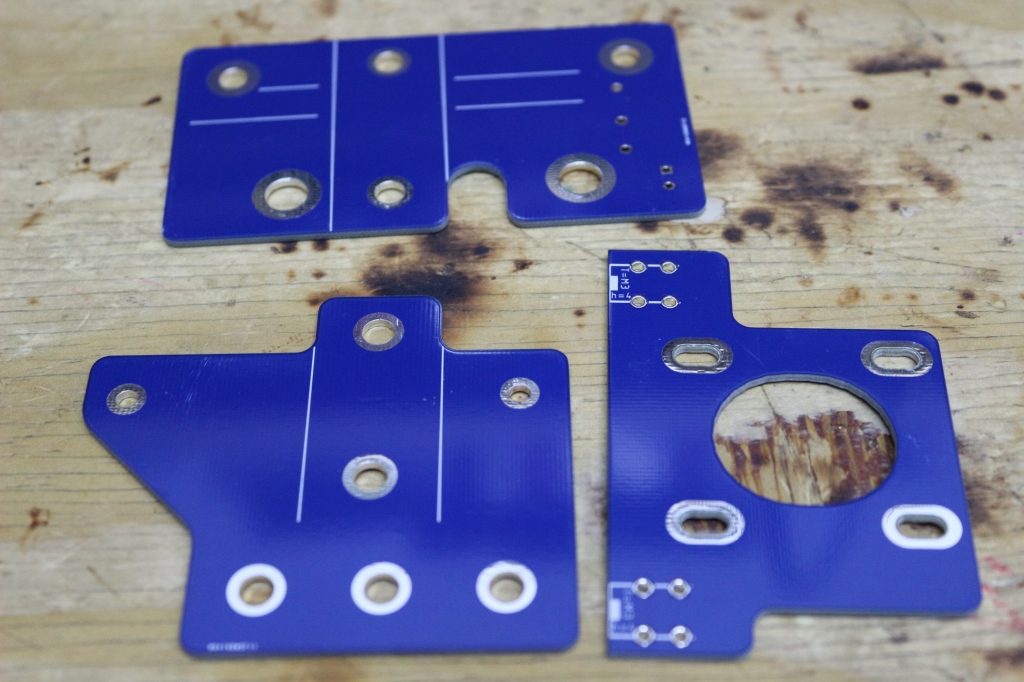
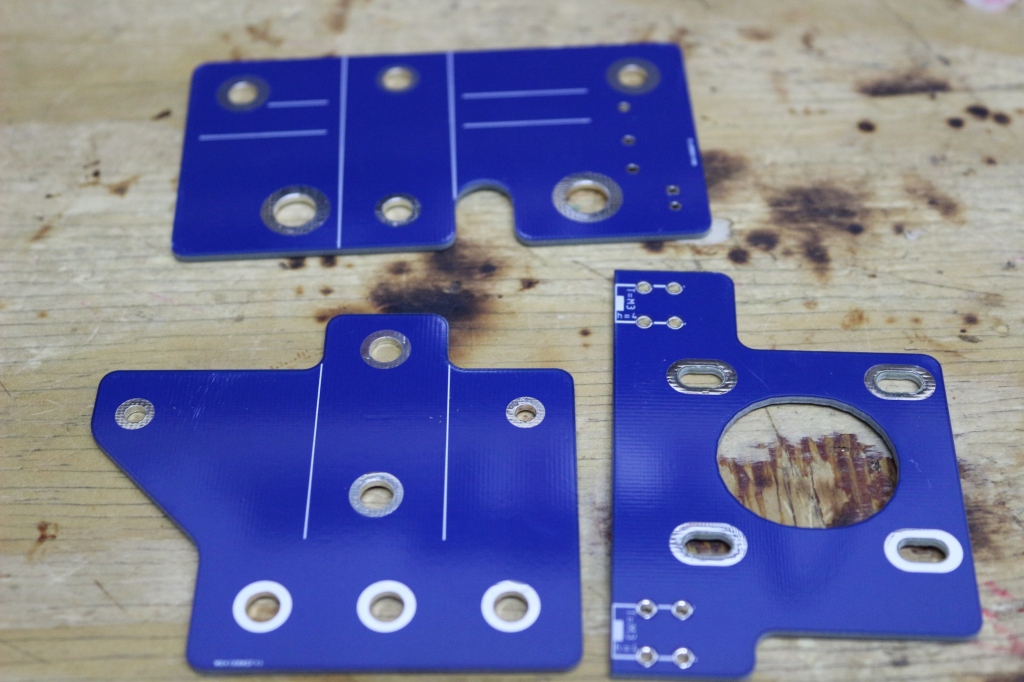
Lets take a look at the PCBWay boards quality: (Gallery below) Looks good to me, their silkscreen printer seems to get the fine details printed nice and clear
The screenprinting of my (new) logo really came out great too:
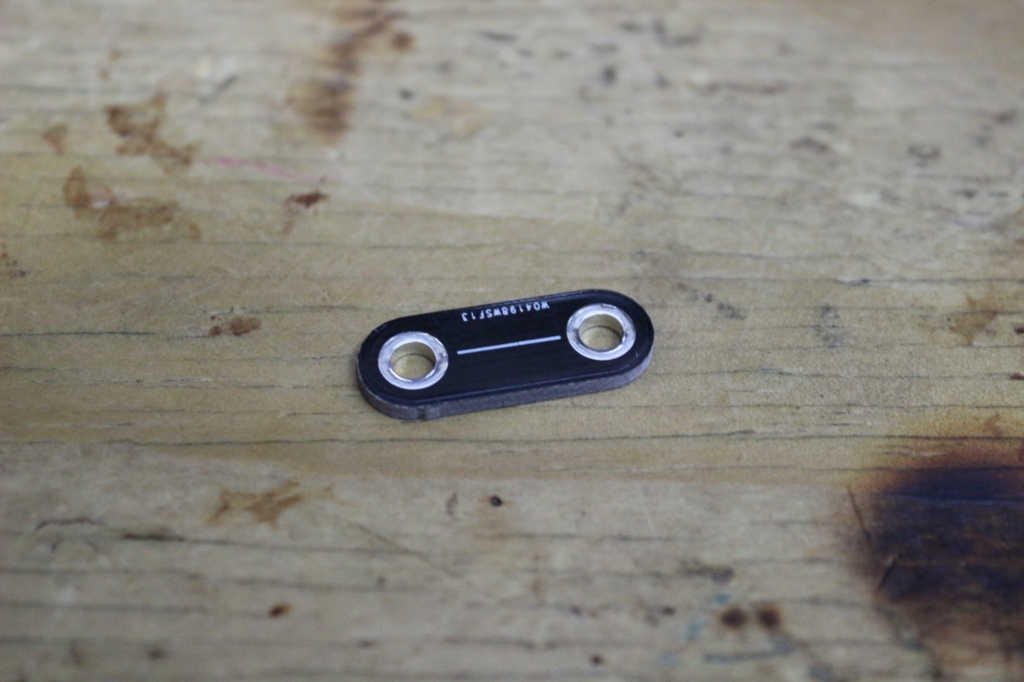
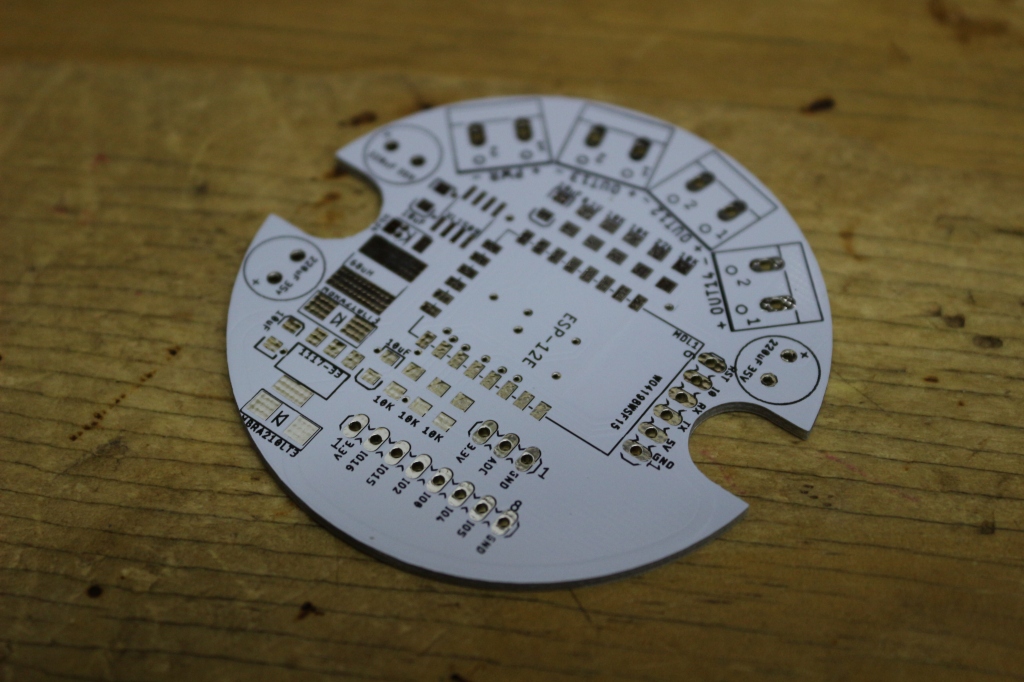
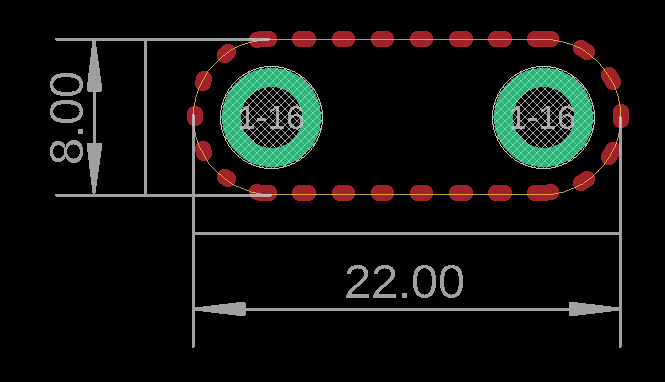
And lastly, none of the other PCB houses I wanted to order from, was willing to make the little Belt Bracket PCBs: It’s only 8x22mm! PCBWay did it without any complaints (: – milled out all round as well. Nice!
Overall, quite impressed with PCBWay! I did have a lot of back and forth emailing with Gloria in their marketing department due to the shipping issues (and they sponsored this batch of boards for me, so we talked a lot about the boards I can order under the terms of that) – even without the sponsorship though, they honestly can’t be beat:
5/10pcbs (<100x100mm) no bullsh*t! – some other PCB houses do $2/10 for the first 10, and then $10-25 thereafter. PCBway kept the $5 price for every line item (: – nice to see the honesty in that
Shipping was amazing (free upgrade to serve the customer in a term of trouble)
Great communications, actually talks and understands English which is a big plus.
Website: Ordering is a breeze, and they review the boards on the fly while you are adding to the cart. Nice, can pay the same time. Some other PCB houses review manually and you end up having to check the order the next day, and if its approved, only then can you pay
Boards looks great, no problems at all. Followed the Gerbers straight out of Eagle, even with strange cutouts, and crazy small little boards. Well done to their technical team for interpreting the gerbers that well.
Long story short, they got a customer for life out of me (:
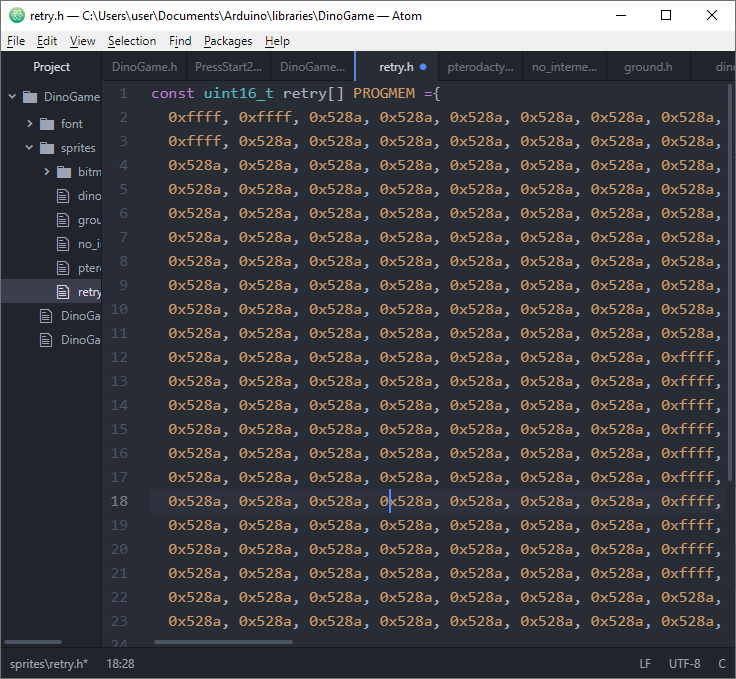
The awesome AdafruitGFX library can draw Bitmaps stored in PROGMEM to TFT LCDs. That much we all know Usually though, we use Monochrome bitmaps for that right? And we all know the tools (LCDAssistant, image2cpp, dotmatrixtool and many more) to convert Monochrome Bitmaps to the required format for use with AdafruitGFXs drawBitmap function
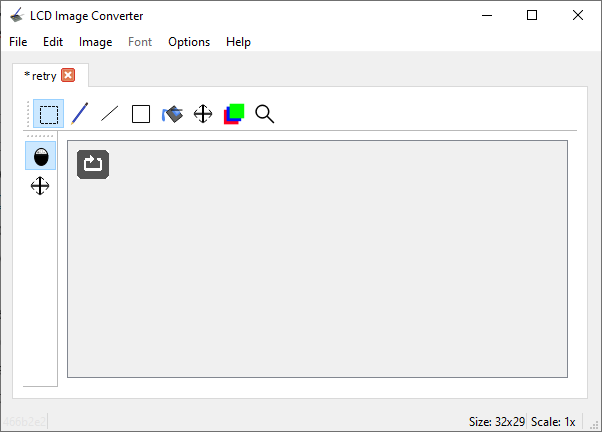
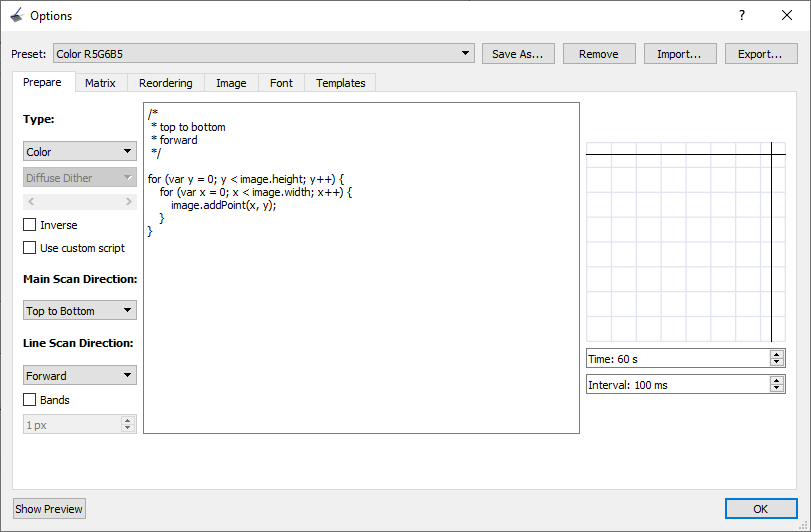
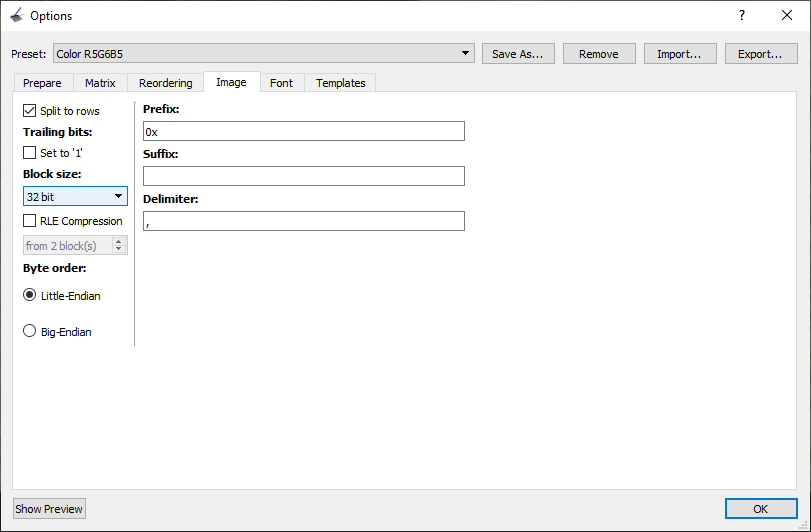
But, recently, I was working on a project that needed Color bitmaps, and thus needed to work with the AdafruitGFX drawRGBBitmap function! Took me a good day to find a tool, settings, and make it work in Arduino, so here you go so you don’t have to lose a day!
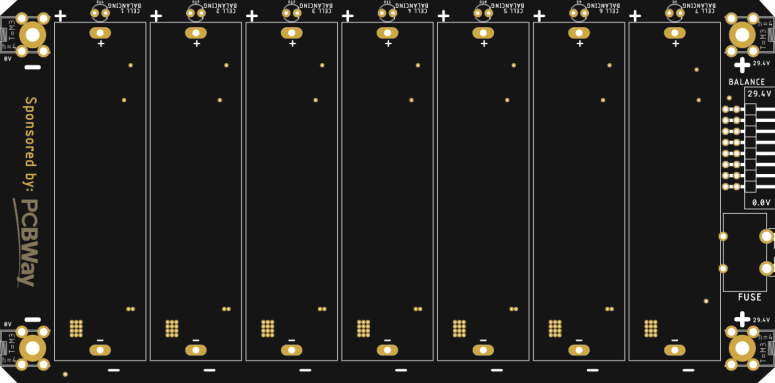
While I cannot afford a Tesla PowerWall, I’ve spent some time drawing up a PCB to house 7x 18650 cells in series. Each board has onboard Battery Management:
Overvoltage Protection (per cell)
Undervoltage Protection (per cell)
Balance Charging
Overcurrent Protection
Main pack Fuse
Each PCB has pads that allow you to stack them on top of each other with some 25mm Brass spacers, to increase the pack capacity by joining several 7S strings in series (for example stacking 10x PCBs gives you a 7S10P Battery. If you used 2500mAh cells, that would be a 21-29v 25Ah pack!
Costs are looking good, in the region of under $15 per board, keeping in mind it includes the BMS circuitry, that’s pretty cheap!
Back of the DIY 18650 Powerwall board, BMS circuitryFront of the DIY 18650 Power wall PCBs: 19850 Cell Holders
Currently raising funds, need to order cells, boards and parts (: If you want to contribute, get in touch https://www.paypal.com/cgi-bin/webscr?cmd=_s-xclick&hosted_button_id=KC92Q2BJL4S7U&source=url
I can understand your frustration! File formats for use with CNC can become quite confusing and understandably frustrating.
They key thing to learn is that just because it is an SVG or a DXF, does not automatically make it a “file that is suitable for cutting” – which is why most CAM software are having issues with your files.
The key thing to remember when preparing a file, is that the CNC needs a “path” to follow, and as such, whatever is in the file, has a few criteria it must adhere to for the CAM software to understand it. It does differ for SVG and DXF though, so let me break it apart below for you:
SVG: SVG is a widely used format for sharing image data. Vector images are images consisting of “lines” (Not necesarilly paths) but it can also contain other Data (that CAM would not usually understand as lines/paths either) like Text entities (just a font with text. Its still an editable text entity, not a path yet (more about converting to paths later), embedded Bitmaps (a bitmap image does not contain any line/path data) and also native SVG object (not converted to paths yet).
These “other” types of entities inside your artwork may not be understood by CAM software. In order for a piece of software to know what to do, the “elements” inside the SVG ideally need to conform to:
Be a VECTOR, but also of the type SVG:Path: Almost all Vector editors has a toolset for “Convert Object to Path”. Use this tool to convert all vectors to Paths. Some has an extra command for “Convert Text to Path”. Specific use information for this is available in your vector editor software’s documentation
Preferably be a CLOSED vector; Closed Vectors are a combination of lines/arcs/polylines/beziers, etc that share the same start-point and end-point: For example: A square is a closed vector, but if one side is missing, and there is only 3 lines that does not “close” back together, its not a closed Vector. CAM software cannot perform “offset” calculations from Closed Vectors as it does not have any data to know the inside/outside of the line from.
Convert any Bitmap artwork to Vectors: As CNC’s need to follow a Path, a Bitmap needs to be converted to a Vector; Most Vector Editing software allows you to “Trace” a bitmap.
Simplify: If you did not draw the artwork yourself, there may be thousands of extraneous nodes in the vectors. All this extra data is ideal for high resolution printing, but to use the data for a CNC, its best if you can simplify it. Most Vector Editors have tools to reduce the number of nodes (for example deleting ones that are on the same straight line, only keeping the ones on each end, or by joining nodes within a certain distance from each other)
DXF:
DXFs are a little harder as over the years the standard gets changed every few years. The most used standard is the “DXF R14 Polyline” definition.
Most CAD software allows you to “save as” an older DXF version: Select R12 or R14
Convert all Splines, Arcs, Text, etc to Polylines. Polylines are similar to Closed Vectors above, under SVG: IE its a continous array of segments that form one entity. CAM softwares love to work with Polylines. The tool is sometimes called “explode” as it can explode a spline into a polyline, for example.
If you save as DXF R14, and all the objects inside the DXF are converted to Polylines, it should work for 99% of the cases.
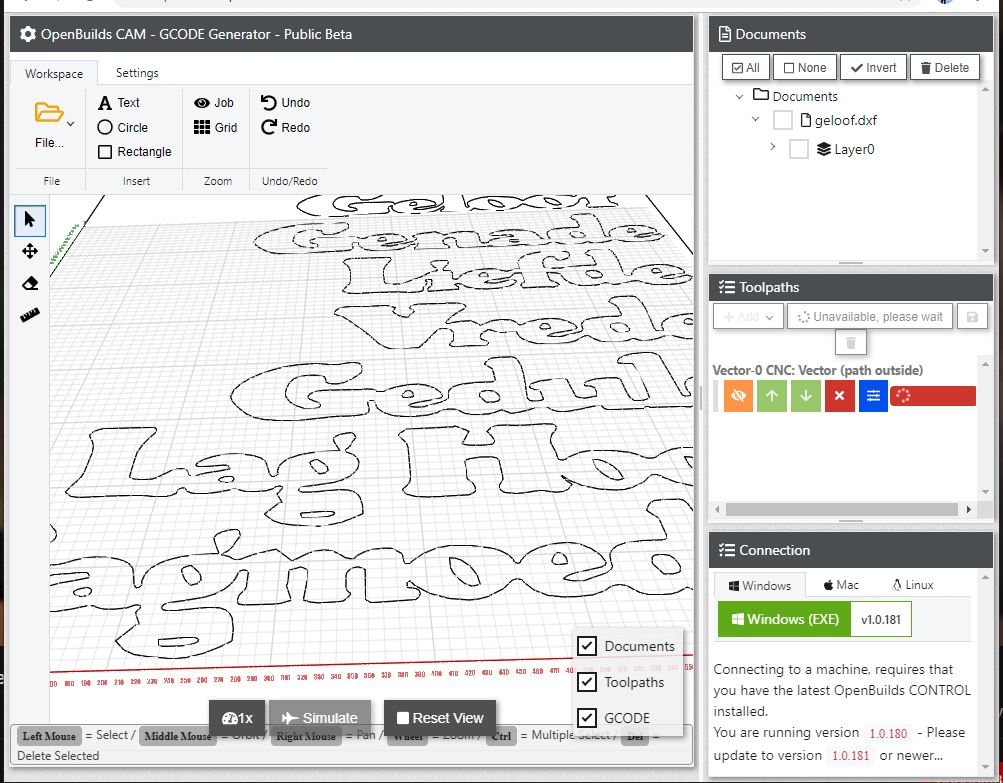
In terms of your question: “I’d even be delighted if you could just tell me which software to use”, I can offer you what I personally use for most jobs:
SketchUp Make 2017, with the GuitarList DXF Plugin:
The 2017 Free edition of Sketchup is still my goto for most “engineering” like jobs, think plates, brackets, signage, etc. Natively the free version of Sketchup cannot export DXFs, but the GuitarList DXF Plugin does a super job of exporting DXF R12 Polylines (select DXF Polyline on export): See https://www.guitar-list.com/download-software/convert-sketchup-skp-files-dxf-or-stl and https://www.sketchup.com/download/make
Inkscape:
Inkscape is my go-to for any SVG work. It has a pretty good bitmap tracer in the form of PoTrace (Import a bitmap, right click, Trace)
It also has tools to convert to Path (Select All, Path, Object to Path – in one go convert everything in the file to Paths)
Once you give a little thought into what CAM software needs to calculate offset paths (to move the cutting path off by half the width of the endmill, so the cut comes out the right size) you will eventually be able to check a file visually for issues. Open Vectors are the most troublesome (edit the nodes and close them if possible), as are non-polyline objects (a polyline describes the entity as a singularity… a bunch of loose lines not joined into a polyline doesnt mean much to CAM softwares)
And to me the most important lesson: Its often better to redraw something yourself, than use that file off the internet (: – as you can use the native tools in your favourite application, the chances of a success just goes up. That random file on the internet, who knows where its from, whats inside it, how many conversions between formats has there been to it, etc.
VFD – variable frequency drive. You know how regular AC is 60hz (60 times per second cycles the AC current wave) – a motor connected to mains, runs at some multiple of “60x/sec” natively. Getting different speeds, depend on cutting power to it for some duration of each cycle (thus you can control the speed, but you have to sacrifice output (horsepower) in the process.
A VFD takes the incoming mains, makes it high voltage DC. Then uses an inverter to make it back into AC but a variable frequency (usually 100hz -> 400hz for cnc spindles) – so the motor can then be fine tuned to any RPM without limiting its output power.
Why is this a thing in the CNC world? Well if you do really advanced machining, you want the exact rpm of the bit spinning to calculate just how big a chip of material its cutting per rotation. Then you move the bit along at a exact optimal speed to take just the perfect size of chip to a) remove as much material as possible and b) ensure optimal tool life.
However, thats on big steel framed industrial machines. Our hobbygrade machine, flex a little so you can never dial that recipe in that close anyway as you need to accomodate the flex and loose belt drives and cheap leadscrews. So its pointless adding a heavy, complex, VFD spindle on our machines. It like putting a V8 with twin turbos and the worlds best engine management computer, into a golf cart
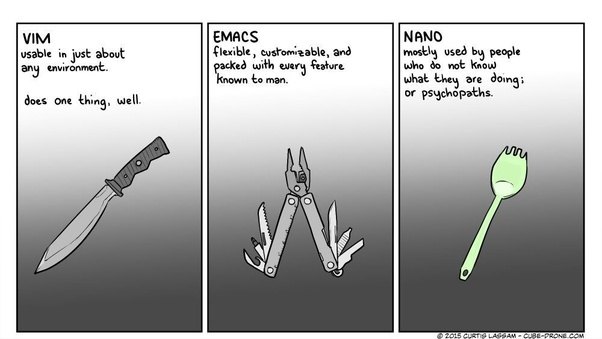
What does it do? Its a text-editor with some added tools to syntax highlight code (amongst others) – makes typing code just a little easier. By far not the only one! Like I said in part 2 – theres passionate supporters of every editor out there. I am an Atom fan, but you dont need to be. Heck, if your on Linux, you could even join #vim-vs-emacs fights on Reddit
What does it do? GIT is a Version Control System. It helps you code in a way that has a history attached to it – working in any kind of team, or releasing a project as open source will see you working in git. Also, getting code from others, often involves a little git. There’s also a big developer community around Github, so make sure to sign up for a free account at Github too while you are at it.
NodeJS – Install this to get support for the NodeJS environment, and it also installs the Node Package Manager (npm) that is used for installing and managing other node components: https://nodejs.org/en/
PS: Make sure to grab NodeJS LTS Version (v8 at the time of writing) – the LTS versions are “Long term support” versions, ie stable, and will be maintained for a couple years. Makes your code work longer.
Browser: Chrome for the win
Yeah I know, its contentious – but Chrome just has the best developer console of them all. I won’t force you to use it as your daily driver against your will, but any specific debug exercises will be shown in Chrome, so easier to follow along.
These are tools that run online, and give you a one stop window to test a little html+css+js in a quick go fashion. I use it a LOT while developing user interfaces. The community around these also share some amazing work you can look at, learn from, and fork. (What’s a Fork? You’d know if you played the Git Game above (; lol)
Probably the most argued topic on the internet, after VIM vs Emac (No… that ones Part 3 (; – just wait!) is which language to start of learning.
When I got started, most of the actual work I had to do was web-based things at the time, so I had my earliest coding experience in PHP. Not as writing code though, just simple modifications to Joomla templates, that sort of thing. But I have to admit its been years since I had to look at any real PHP. Along with that there was a little frontend work (HTML mostly) but again, nothing advanced.
Then for a while I did server support for the folks at Novell, where most of the applications was some kind of Java running on a Tomcat server. Sadly here it was more engineering and implementations, than coding, so I won’t dare say Java had impact on my life. During those years though I had a lot more exposure to plain scripting. Yeah you know, those same Batch files you already know. And their cousins over in the Linux world, Bash Scripts. Initially nothing more than sequencing a few repetitive commands/task to ease the laziness (:
It wasn’t really until around Nov 2015 that I started “coding”. At the time I had a “need” – i needed an application to convert CAD drawings to GCODE for running the Laser Cutter I just built. at the time there wasnt any free software that could do it, and well, I am frugal as fuck! One of the most major things that software had to do was talk to a physical controller over USB Serial. Thats kinda daunting. But the wonders of open source came to my rescue and I found a project called CNCWeb online that had some example code of how to talk to a CNC machine over serial. This was written in, what up to now I was told is the evilest evil in the world, JAVASCRIPT!. So learn it I had to, to eventually modify CNCWeb into the now infamous LaserWeb
Oh no, Javascript? Whats that? Java’s useless Cousin? A scripting language not usable for anything? Yeah it has a kinda bad rap. But … we also live in interesting time, and somewhere in the world there’s a lot of hipsters sitting in front of macbooks and sipping Starbucks, who realised that JS is a pretty popular language…. And suddenly its making a comeback like nothing!
So, as we near the end of 2018, Javascript has become the language of choice for the things I have to do. “Wait what? How! I thought it just runs in a web browser?” I hear you say? No longer my friend. Javascript can run on ANYTHING. And think about it, of all the apps, pages and things you interact with daily, name one that doesnt?!
Everything you say? Well… YES. And in many cases the SAME code runs on everything. Everything like what?
Browsers. Almost every device today has a browser and they ALL understand Javascript.
Bare metal applications. Enter NODEJS – a Javascript engine that runs on Windows, Mac and Linux – and allows your applications written in javascript to run without a Browser
Pretty packaged applications. There’s ELECTRON – an add-on to NodeJS that helps you pack the application into a nice installer that runs on Win/Mac/Linux (Same code, runs on all three OSs! Neat huh?)
Mobile Applications. That same Javascript skills you already have now? Yeah – they can be made into Mobile apps for very little extra effort too! Using an awesome tool called CORDOVA
Lets go a little further into the Absurd! Remember those PCBs with Microcontrollers on them I showed you, yeah, turns out you can also run Javascript on them with ESPRUINO sometimes!
See why I am thinking we start you off with Javascript yet? One skill, ALL platforms!
Oh you said that hasnt convinced you yet? Lets try and find a few other reasons.
Remember how in Part 1 I said LIBRARIES make your job easier? Well checkout the NPM (Node Package Manager) repository at NPNJS.COM – literally thousands of modules you can use in Node/Electron applications. Want a library to make a pretty user interface? Checkout MetroUI and Bootstrap. What about a couple plugins for the mobile world? Checkout CORDOVA PLUGINS. 3D Animations and WebGL, and WebVR etc? Nothing easier or better than ThreeJS
What about Documentation? Checkout the Documentation links on the pages above! Projects like Cordova, Metro, ThreeJS, etc all SHINE at this!
Need to ask for help? Stackoverflow man, its saved me so many times! Not only for asking questions, its a GOLDMINE for finding working example code!
Future proof? Hell yeah, they are even going as far as not calling it Javascript anymore. EMCAScript is turning in a full on programming language! Learn today, can still use tomorrow
Is there life after JS? Yes of course. Basic development concepts we learn in JS (Whats a Variable, whats a function, whats a Class, whats an Object, how does Scopes work, how to Build, etc are all going to be transferrable to other languages! But right now its EASIER than any of the other languages. A forgotten semicolon wont break JS code (;